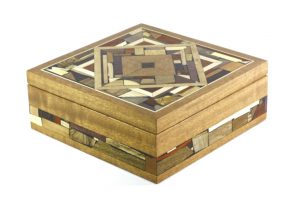
Mosaic Box-Wood and Wood Mosaic Memory Box
Etz-Ron is long synonymous with natural wood mosaics cut from real wood pieces. The wood pieces are hand inlaid in random patterns and, in turn used to decorate a variety of functional wooden works of art and Judaica. Over 30 different kinds of wood from Israel and around the world are used in every mosaic piece I create. The amazing array of natural colors and patterns are highlighted and become the focal point of the piece. No stains or dyes are used on the mosaics, and each wood has a different color, pattern and story to tell. When put together, my mosaic creations are completely unique from one another, but the process is the same: long, detailed and extremely rewarding.
The Woods

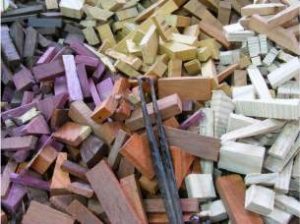
Mosaic pieces ready to be inlaid
I begin by cutting up the wood to make the pieces. Because I have been saving interesting wood for years, the variations in color and pattern I’ve collected are amazing, even when you are talking about the same species of wood, or even the same board of wood! Cutting across the piece to see the growth lines will give you a different pattern than cutting along the axis of the trunk of the tree. The patterns seen are all called “grain”, and grain can be straight, spiraled, edge, figured, narrow, open, closed or a myriad of those combinations and more.
Even the place where the tree grows effects the wood grain. Wind and rain, or lack of wind and rain, impacts the wood’s growth patterns. The composition of the soil where the tree is located can affect the color of the wood, and the rate of growth as well. Together, all these factors make for many different combinations of color and grain. When all the different pieces of wood are meshed together, the overall effect of the mosaics are stunning.
The Mosaic Process

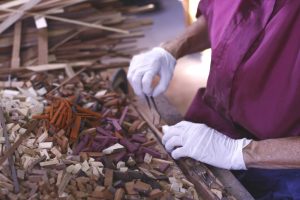
Inlaying the mosaics into the base wood
After all the pieces are cut, I place them in piles before me and I begin to inlay the little pieces into a larger piece of wood. I take care to repeat the different colors and hues in proportion, so that the finished piece will be interesting, and balanced.
When the glue has set, the piece of wood with the inlays is trimmed, and then run through a thickness planer. After that, it is back to the glue table and time to fill the glue voids, to repair any mosaic piece that was inadvertently damaged during processing. Then the wood is surfaced once again and sanded. It is now ready to be machined and jointed to the size and shape of the item I am creating.
After the pieces are machined, jointed, and assembled, it is sanding time again. Finally the finish coats of clear polyurethane are sprayed on one coat at a time, over 3 days. Each coat is sanded out before the next coat of polyurethane is applied.
The Result
I find the whole process of making the mosaics extremely rewarding. When I am fitting the mosaics together, it is like fitting pieces of a puzzle, like creating an abstract drawing with wood. I never really know what the puzzle will look like until it is completed. The result is a smooth and sleek surface, eminently touchable, yet with depth and abundant interest.
Browse my website and judge the overall results for yourself. Don’t forget to let me know what you think.